Running LLMs on RunPod
Introduction
I’ve recently been experimenting with RunPod, a platform that allows you to run Large Language Models (LLMs) on the cloud. RunPod is a great tool for those who want to explore the capabilities of LLMs without having access to the latest GPUs. In this post, I’ll be documenting how to run LLMs on RunPod, along with some tips for overcoming common issues.
Prerequisites
Sign up for a RunPod account here. You’ll need to provide your name, email address, and password. Once you’ve signed up, you’ll be able to access the RunPod dashboard.
Running an LLM with Text Generation WebUI
- From the
Podstab in the RunPod dashboard, clickNew Pod. - Select your required number and model of GPUs from the available list. RTX 4090s are powerful enough to run most quantised LLMs, but you may need to use a RTX 6000 or larger for some models.
- Under your selected GPU, click
Deploy. - I recommend using TheBloke’s One-Click UI template as this comes pre-installed with the required dependencies for running LLMs. If it’s not already selected, use the UI to search for the correct template and select it (see screenshot below for reference).
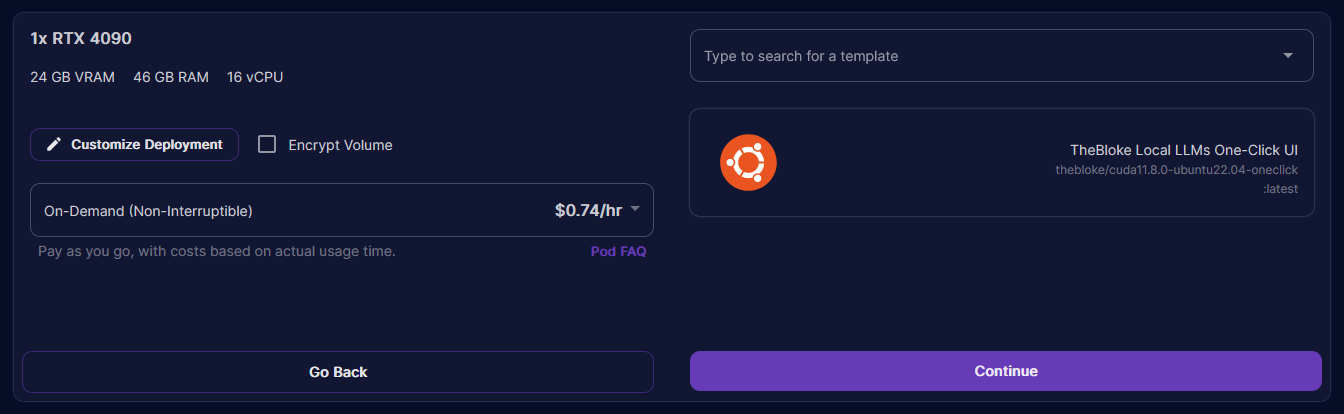
- Click
Continueand thenDeploy. After a couple of minutes, your pod will be ready to use. - Once the pod is in a
Runningstate, clickConnectto open theConnection Options. - Click
Connect to HTTP Service [Port 7860]to launch TGWUI. - In TGWUI, select the
Modeltab. You should now see a UI similar to the one below.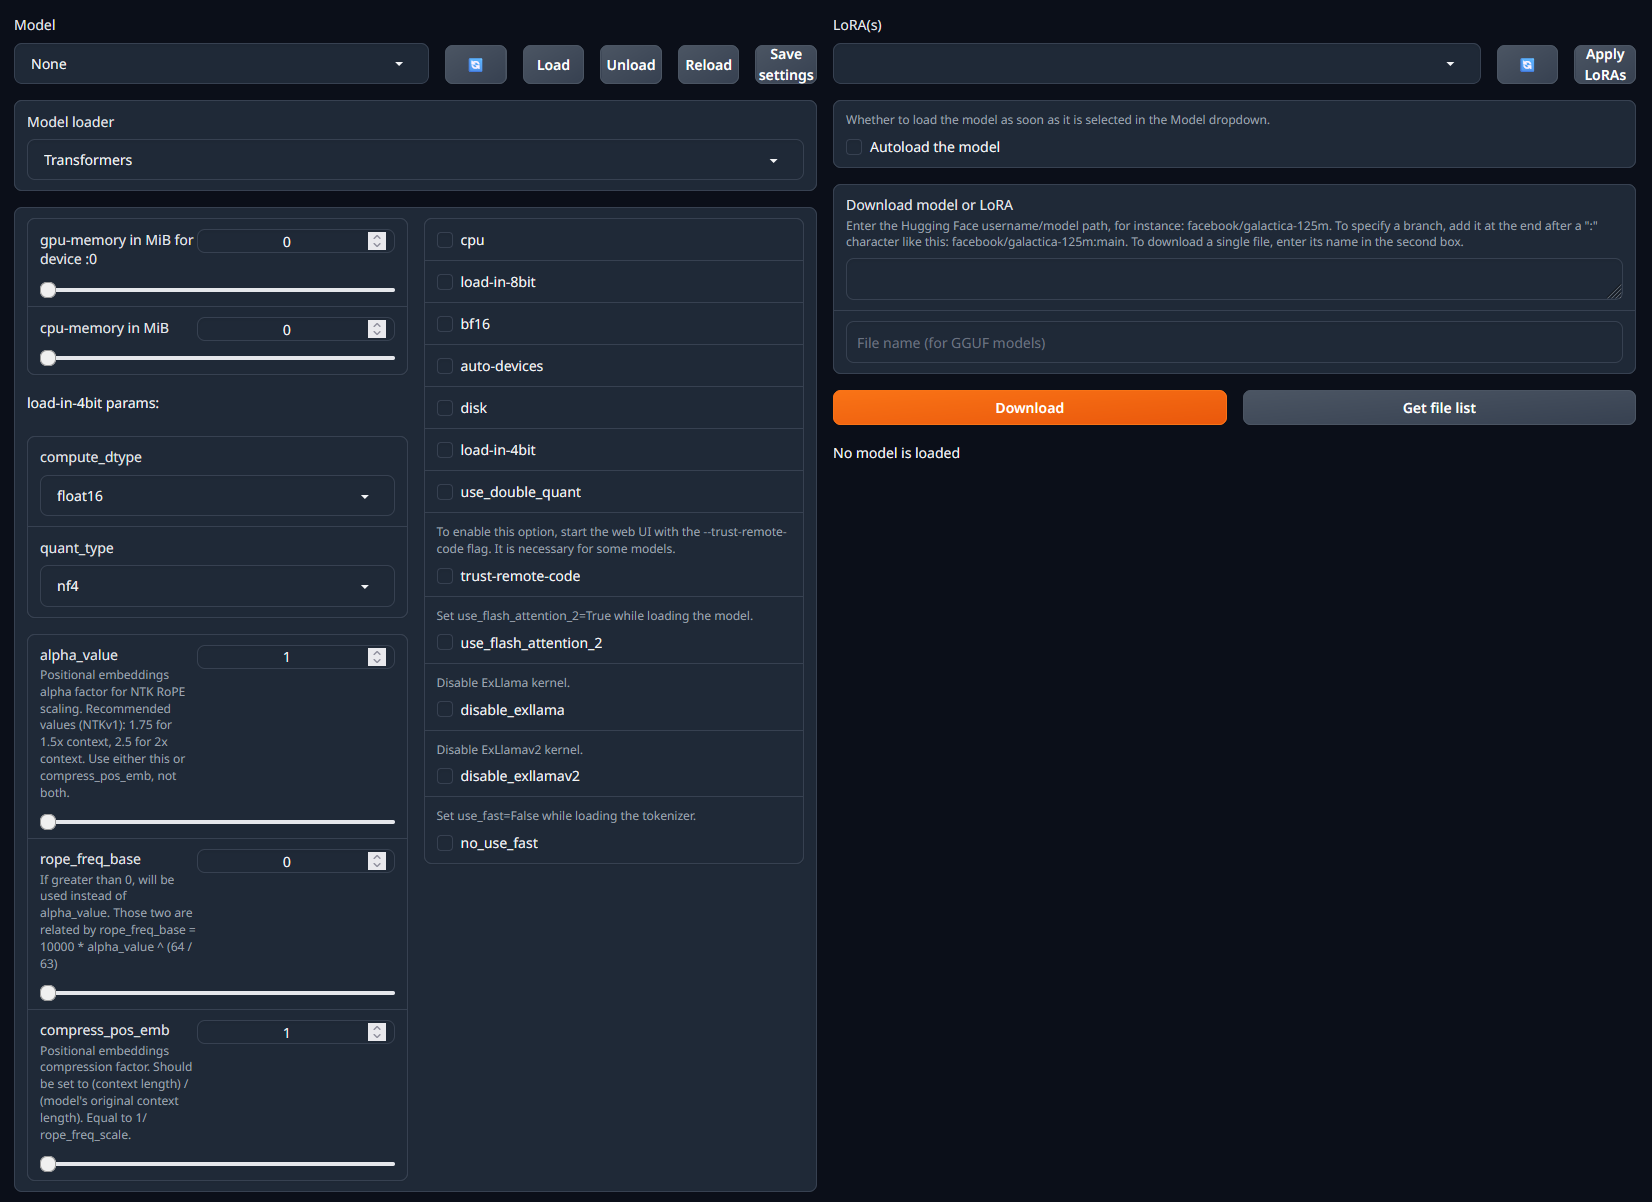
- Within the
Download model or LoRAsection, paste in the username/model path from HuggingFace. For example, if you wanted to run the dolphin-2_6-phi-2 model, you would paste incognitivecomputations/dolphin-2_6-phi-2. - Click
Downloadto download the model. - Once the model has downloaded, refresh the list of available models in the dropdown menu in the top-left of the page. 12. Select the model you want to run and click
Load. - At this point you may see some error messages displayed. These are mostly caused by missing / incorrect configuration settings. See the model details page on HuggingFace or the Common Issues section below for more information on how to resolve these.
-
With the model loaded, you can now go to the
Defaulttab to start generating text. Enter your prompt in theInputfield and clickGenerate. The model will then start generating text based on your prompt.📝 Note: Don’t forget to use the required prompt format for the specific model you’re working with.
Common Issues
Setting trust_remote_code to true
Some models (e.g. this one) require you to set trust_remote_code to true in Text Generation WebUI (TGWUI). The wrinkle is that while you can see a checkbox for trust_remote_code in the TGWUI, you can’t actually check it. To overcome this, you need to use the RunPod web console to edit the script that launches TGWUI when the pod starts. Here’s how to do it:
- Select the pod you want to edit from the
Podstab in the RunPod dashboard. - Click
Connectto open theConnection Options. - Click
Start Web Terminal, wait for the terminal to load, and then clickConnect to Web Terminal. - In the web terminal run
vim run-text-generation-webui.shto open the script in the Vim text editor. - Press
ito enter insert mode. - Update the arguments (the line that begins with
ARGS=) to include--trust_remote_code. See the screenshot below for an example.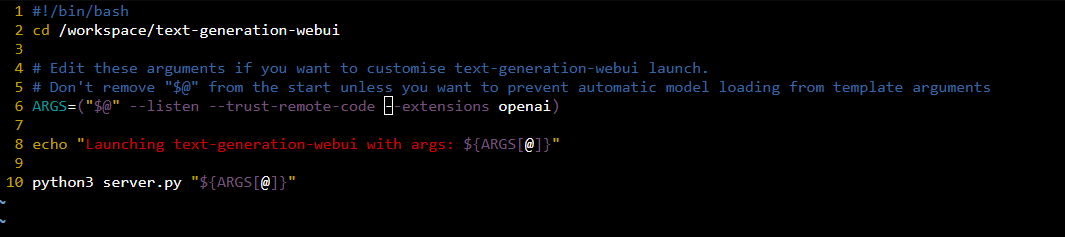
- Press
Escto exit insert mode. - Type
:wqto save and exit the file. - Reboot the pod to apply the changes.