Using RunPod hosted LLMs with AutoGen
Introduction
Continuing my recent thread of RunPod related posts - after I had worked out how to access a RunPod hosted LLM via an API, I immediated started to think about how I could use the programmatic access. One idea I had was to set up AutoGen Studio to use a hosted LLM running on RunPod. This would enable me to try running AutoGen agents using larger models than I can fit on my local machine. This post documents what I did to get a large Mixture of Experts model running on RunPod, and then how I configured AutoGen Studio to access it.
Prerequisites
As before, you’ll need to sign up for a RunPod account here and add a minimum of $25 to your account.
Choosing a Model
I’ve experimented with AutoGen before and I know that it really benefits from using a highly capable model such as GPT-4. While no open-source models have yet reached the capabilities of GPT-4, the recent reviews of Dolphin 2.7 Mixtral 8X7B caught my attention, and I thought that it might be worth trying as an alternative. The unqantised model is huge though, so I decided to try TheBloke’s quantised version as it’s possible to run that on a single RTX A6000.
Running the LLM with Text Generation WebUI
- From the
Podstab in the RunPod dashboard, clickNew Pod. - Select an RTX A6000 from the available list of GPUs.
- Click
Deploy. - I recommend using the RunPod TheBloke LLMs template, as this comes pre-installed with the required dependencies for running LLMs. If it’s not already selected, use the UI to search for the correct template and select it.
- Click
Continueand thenDeploy. After a couple of minutes, your pod will be ready to use. - Once the pod is in a
Runningstate, clickConnectto open theConnection Options. - Click
Connect to HTTP Service [Port 7860]to launch TGWUI. - In TGWUI, select the
Modeltab. You should now see a UI similar to the one below.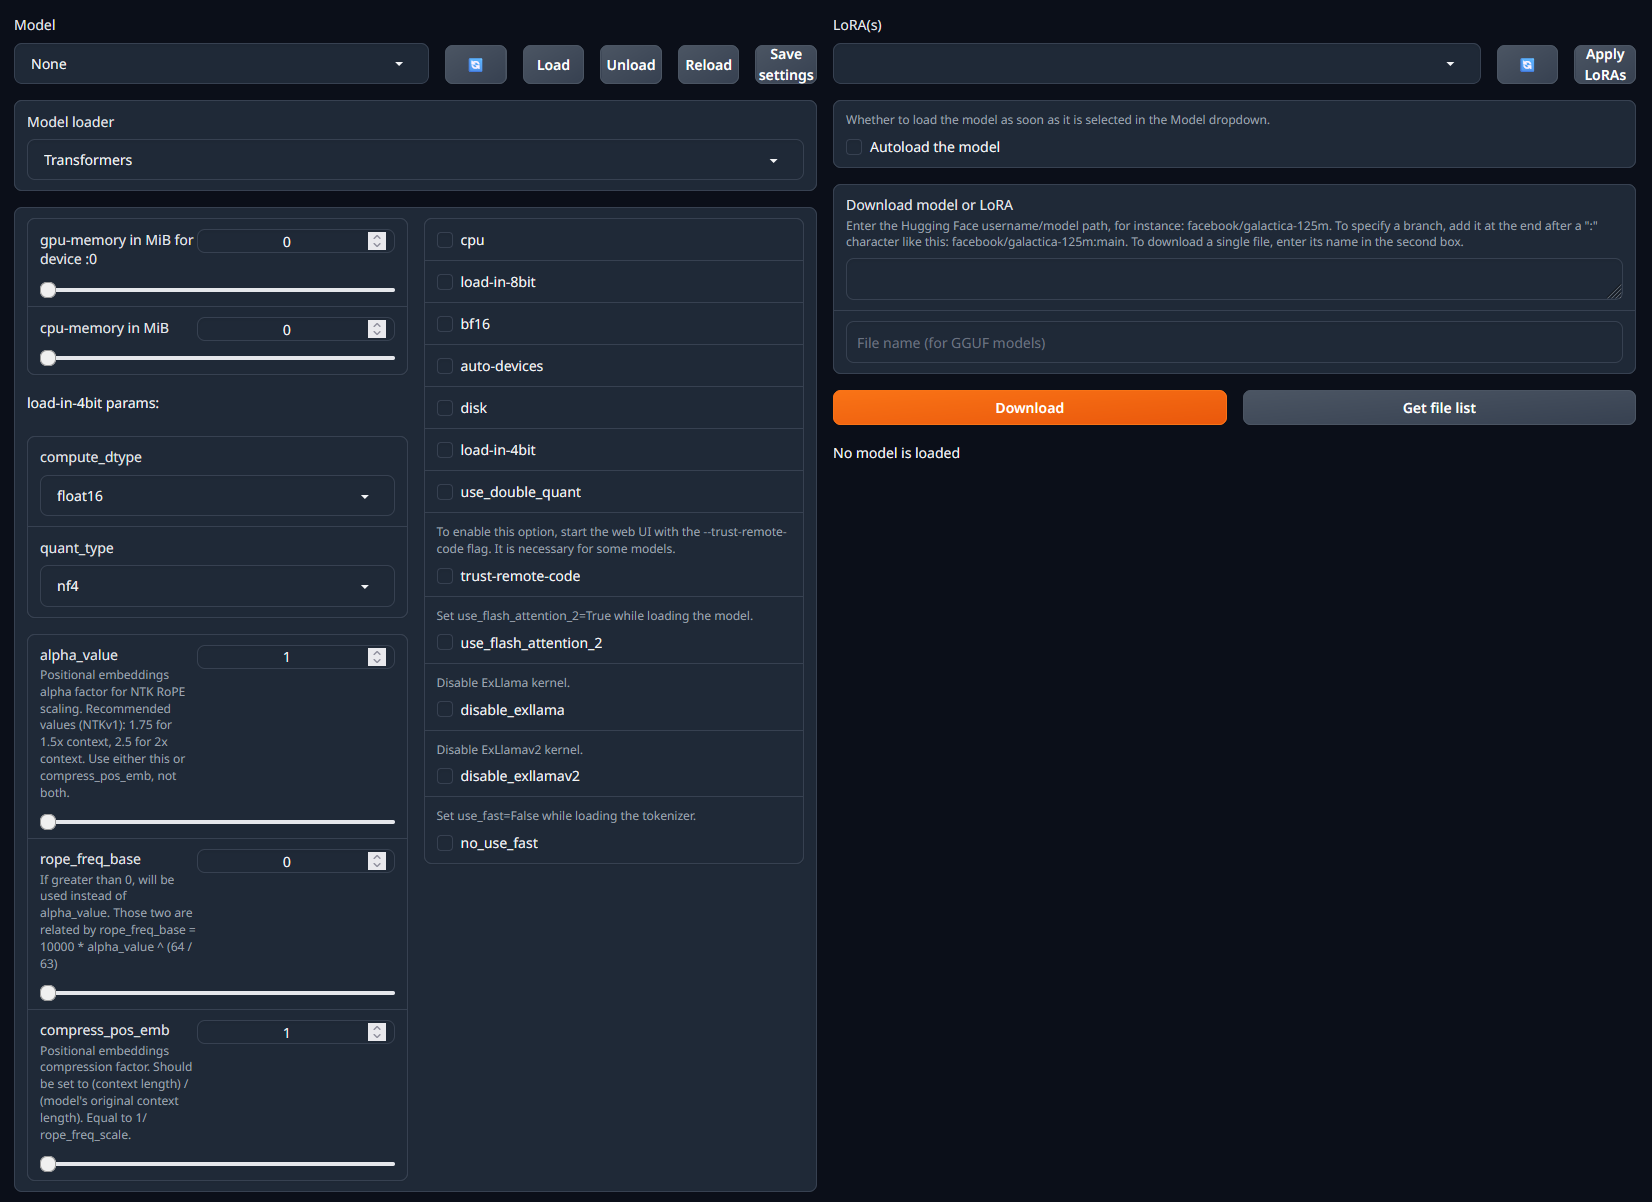
- Within the
Download model or LoRAsection, paste in the username/model path from HuggingFace. In this case we want the Dolphin 2.7 Mixtral 8X7B - GPTQ model. - Click
Downloadto download the model. - Once the model has downloaded, refresh the list of available models in the dropdown menu in the top-left of the page. 12. Select the model you want to run and click
Load. - At this point you may see some error messages displayed. These are mostly caused by missing / incorrect configuration settings. See the model details page on HuggingFace or the Common Issues section below for more information on how to resolve these.
- With the model loaded, we now need to install AutoGen Studio and configure it to use the RunPod hosted LLM.
Installing AutoGen Studio
Installing AutoGen Studio is very straightforward using pip, although I’d recommend using a virtual environment to keep your system clean. The following commands will install AutoGen Studio and its dependencies:
pip install autogenstudio
Once installed, start the AutoGen Studio web UI using the following command:
autogenstudio ui --port 8081
You can now access AutoGen Studio by navigating to http://localhost:8081 in your web browser.
Configuring AutoGen Studio to use a RunPod hosted LLM
I won’t go into the details of how to use AutoGen Studio here, but I will show you how to configure it to use a RunPod hosted LLM. The following steps assume that you have already created an AutoGen agent, or that you’re using one of the example agents that comes with AutoGen Studio.
- Within the AutoGen Studio UI, make sure you’re in the
Buildtab and then click onModelsin the left-hand menu. - Click the
New Modelbutton in the top-right of the page. This will open a new model configuration page similar to the one below.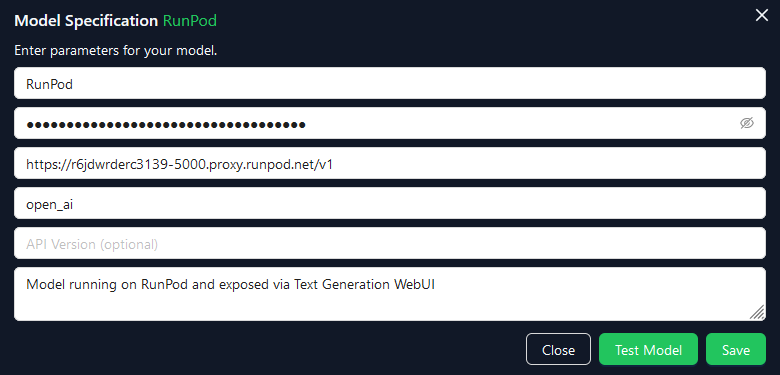
- Complete the following fields:
- Model Name: A name for your model. This can be anything you like.
- API Key: You need to put something in here, but it’s not used for RunPod hosted LLMs.
- Base URL: This is the URL of your RunPod pod. It will be something like
https://<your-runpod-pod-id>-5000.proxy.runpod.net/v1. The /v1 is important as it tells AutoGen Studio which version of the API to use. - API Type: Set this to
open_aias Text Generation WebUI’s API is compatible with OpenAI’s API specification. - API Version: Skip this field.
- Description: A description of your model. This can be anything you like.
- Click
Test Modelto check that AutoGen Studio can connect to your RunPod hosted LLM. If everything is configured correctly, you should see a success message. - Click
Saveto save your model configuration.
You can now configure your AutoGen agents to use the RunPod hosted LLM for inference by simply adding the model to each agent’s specification.