How to install Istio on a Minikube cluster on Windows
Background
Kube by Example has some great guides to help people to learn Kubernetes but they assume you’re running Linux, which I don’t always do. Having worked through their exercise on building Istio on Minikube on Windows 11 I thought I would write up my own guide to refer to in the future.
Aknowledgements
This guide is heavily based on the Installing Istio on a Minikube Cluster guided exercise on Kube by Example. Thanks to them for the excellent learning material.
Outcomes
After completing this guide you will have:
- An instance of Istio installed on a Minikube cluster.
- Identified the ingress service endpoint for Istio.
- Deployed the Istio add-ons.
- An example application running to test the Istio installation.
Pre-requisites
This guide assumes that you have kubectl and minikube installed and are using PowerShell to run commands.
As we’re deploying Istio on Minikube and not a public cloud we will use MetalLB to provide a network load-balancer implementation for the cluster. Follow this guide to install MetalLB on a Minikube cluster. It doesn’t require any changes to work on Windows.
Instructions
Create Minikube cluster
- Start
minikube, ensuring that the cluster meets the minimum requirements for running Istio.minikube start --cpus=4 --memory=8g
Configure MetalLB
- Check that the pods in the
metallb-systemnamespace are running.kubectl get pods -n metallb-system - Verify that MetalLB has the correct IP address range configured. If you’re not sure, go back and check the MetalLB installation guide.
kubectl get configmap config -n metallb-system -o yaml
Install Istio
-
Download the latest release of Istio from Github and extract the .zip file into a location of your choosing.
-
Add the location of the
istioctlapplication toPATH. - Run a pre-check to test whether the cluster meets the requirements to install Istio.
istioctl experimental precheck - Install Istio on the cluster.
istioctl install --set profile=demo -y - List the resources created in the
istio-systemnamespace.kubectl get deployments,pods -n istio-system - From the output returned, identify the external IP of the Istio ingress gateway and make a note of it for later. Note that the IP address is provided by MetalLB as the ingress gateway service type is
LoadBalancer.PS C:\Users\mrwad> kubectl get services -n istio-system NAME TYPE CLUSTER-IP EXTERNAL-IP PORT(S) AGE istio-egressgateway ClusterIP 10.110.202.51 <none> 80/TCP,443/TCP 5m istio-ingressgateway LoadBalancer 10.106.114.255 192.168.59.100 15021:30867/TCP,80:30976/TCP,443:32641/TCP... 5m istiod ClusterIP 10.106.160.228 <none> 15010/TCP,15012/TCP,443/TCP,15014/TCP 6m
Deploy Istio add-ons
- Deploy the Istio add-ons included in the release files you downloaded in Step 4. Update the file path in the following command as needed to match the location that you extracted the files to.
kubectl apply -f istio-1.12.7/samples/addons - Verify that the add-ons have been deployed to the
istio-systemnamespace and are showing as ready. This will take a few minutes so re-run the command as required.kubectl get deployments -n istio-system
Create example application
- Enable sidecar injection for the
defaultnamespace to add anistio-proxycontainer on each pod. That proxy will control the ingress and egress traffic for the pods.kubectl label namespace default isio-injection=enabled --overwrite - Deploy an example application from the
hello-worldsample included with the Istio installation files.kubectl apply -f istio-1.12.7/samples/helloworld/helloworld.yamlThe above command will create a new service called
helloworldand two pods (v1 and v2). - Verify the deployment and pods are ready by running…
kubectl get deployments,pods -l app=helloworld - Check that the service is present.
kubectl get services -l app=helloworld - Create the gateway and virtual service to access the example application.
kubectl apply -f istio-1.12.7/samples/helloworld/helloworld-gateway.yaml - Verify that the gateway and virtual service resources are deployed.
kubectl get gateways,virtualservices
Generate sample traffic
-
Before using the script in the next step, check that you can access the application by opening a browser and navigating to
http://192.168.59.100:80/hello. Replace the IP address with the one for the ingress gateway that you noted down after Step 9. The default port and URL path prefix for the application are80and/hellorespectively. -
At this point you can refresh the browser a few times to test that the load balancer is balancing traffic between the v1 and v2 pods, but that quickly gets boring. The Istio sample files include a
loadgen.shshell script to generate traffic automatically but, as we’re on Windows, we’re going to use the following PowerShell script:$env:GATEWAY_URL = "192.168.59.100:80" # Set this to be the ingress IP and port number for Istio while ($true) { curl http://$env:GATEWAY_URL/hello | Out-Null # Out-Null suppresses the output of the curl command in the terminal Start-Sleep -Seconds 1 # Reduce this value if you want to send more traffic to the deployed service } -
Create the above script in VSCode, it as
loadgen.ps1and run it from the terminal window.
Access the Istio dashboard
- Open a new PowerShell window and run the following command to view the Istio Kiali dashboard.
istioctl dashboard kiali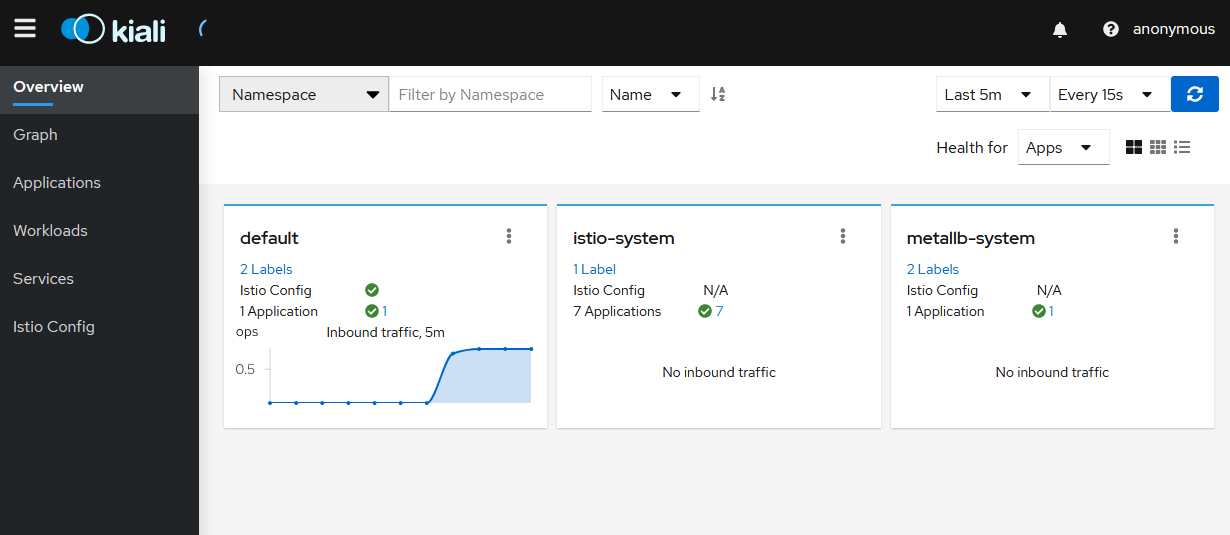
-
Click on
Applicationsand select the default namespace. Click on thehelloworldapplication name.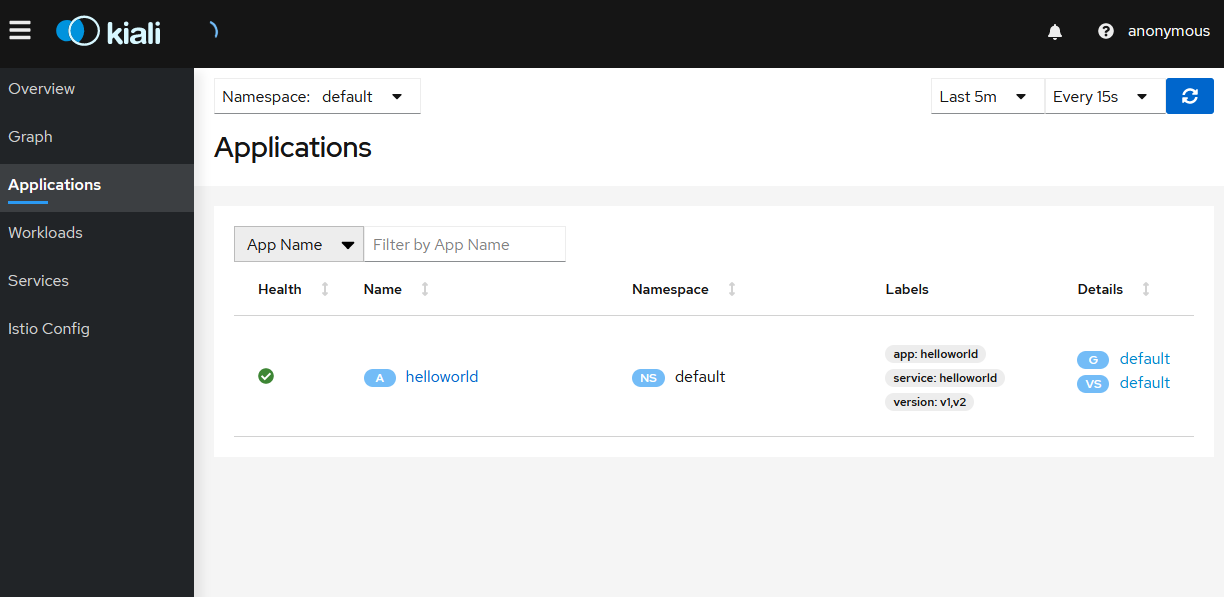
-
The
Overviewtab shows the connections between the Istio ingress gateway, the application service and the pods that are processing requests.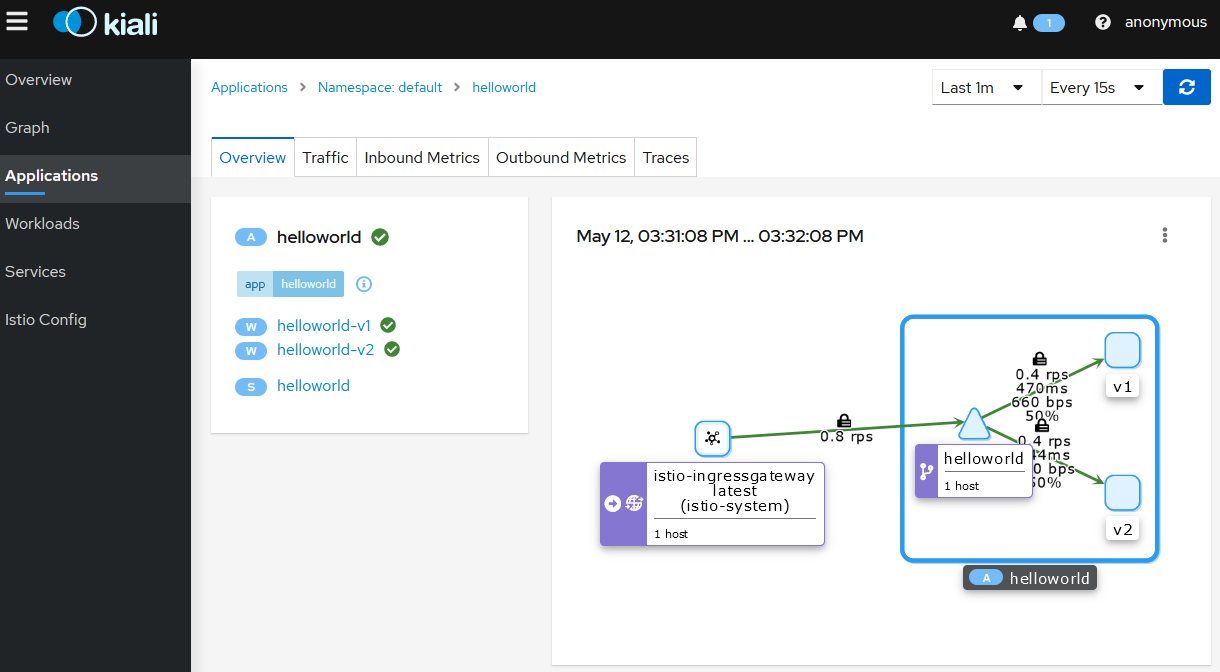
-
Click on the application name, then click on the
Inbound Metricstab to see network traffic graphs.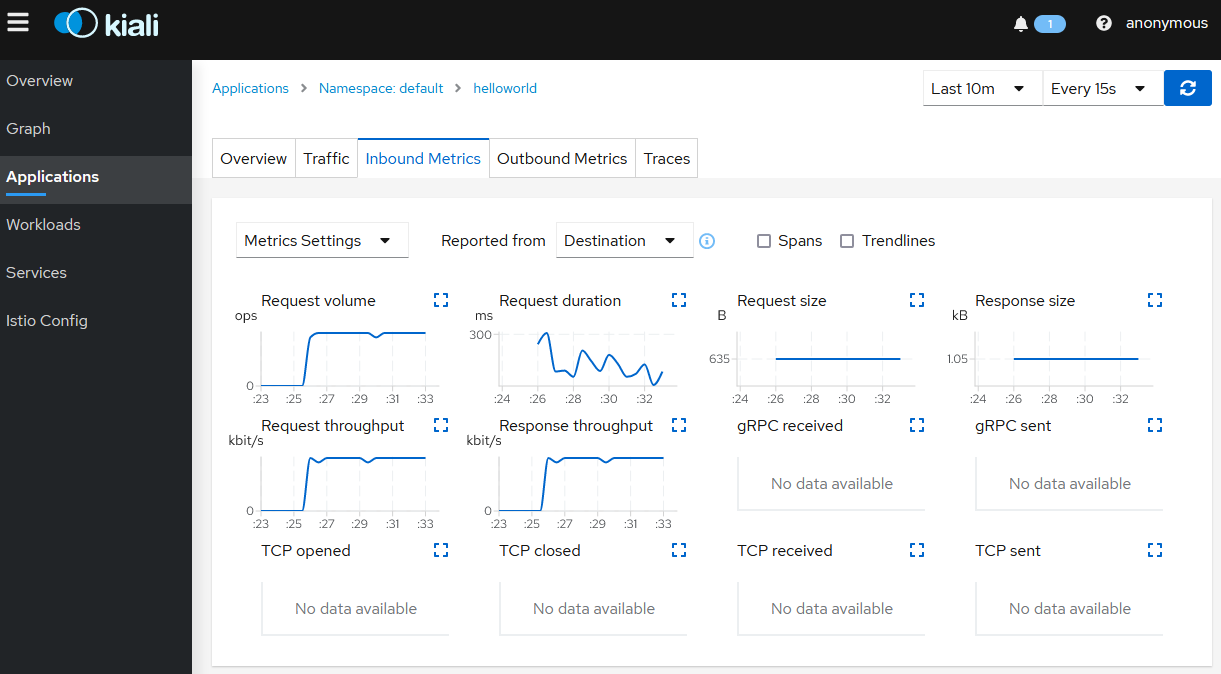
-
Click on the
Tracestab to show the graph with data points for each processed request. Hover on any data point to view the duration of the processing.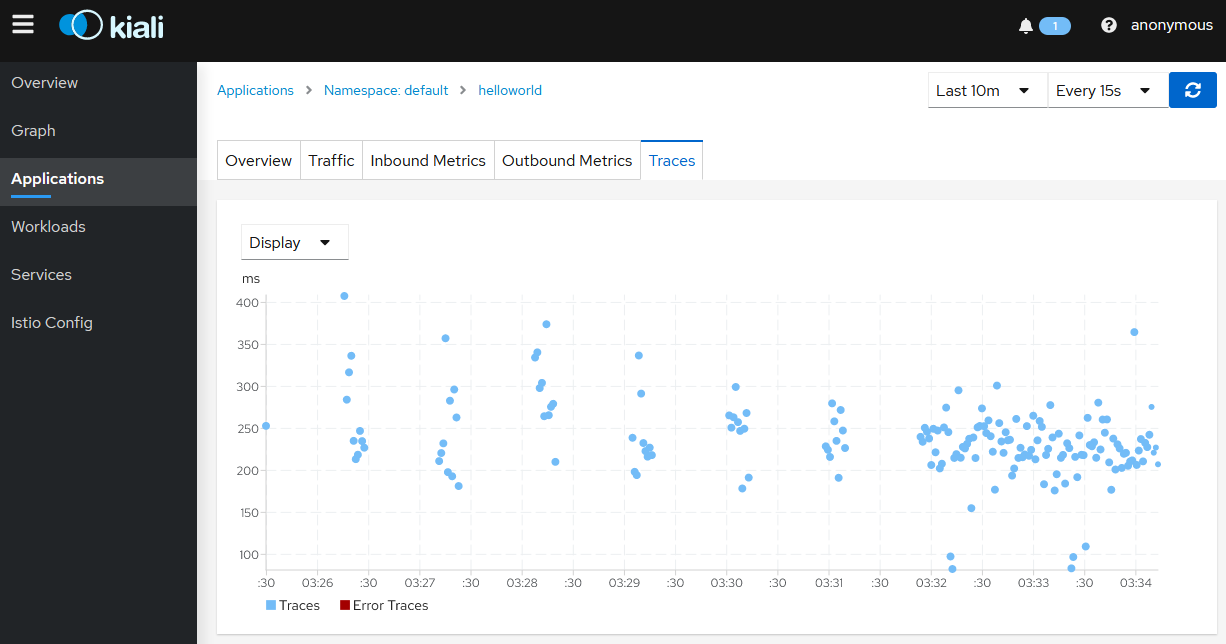
-
Click on
Workloadsthen click on the deployment namehelloworld-v1.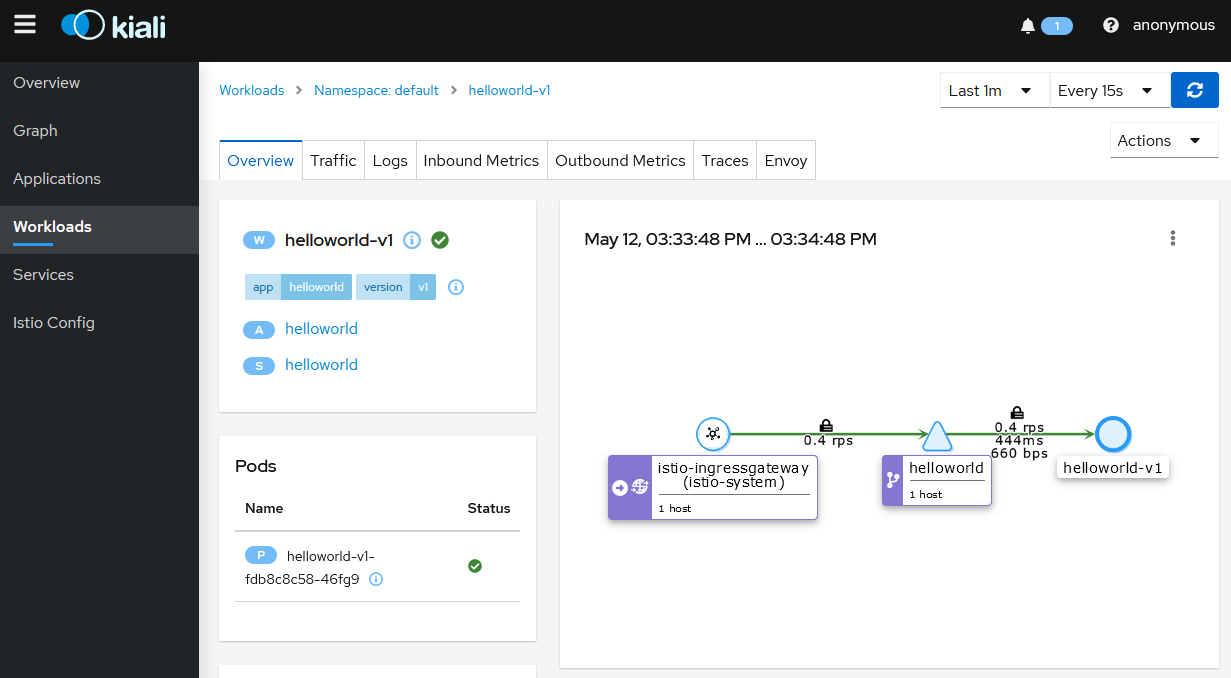
-
Click on the
Logstab to display the logs for the pod containers.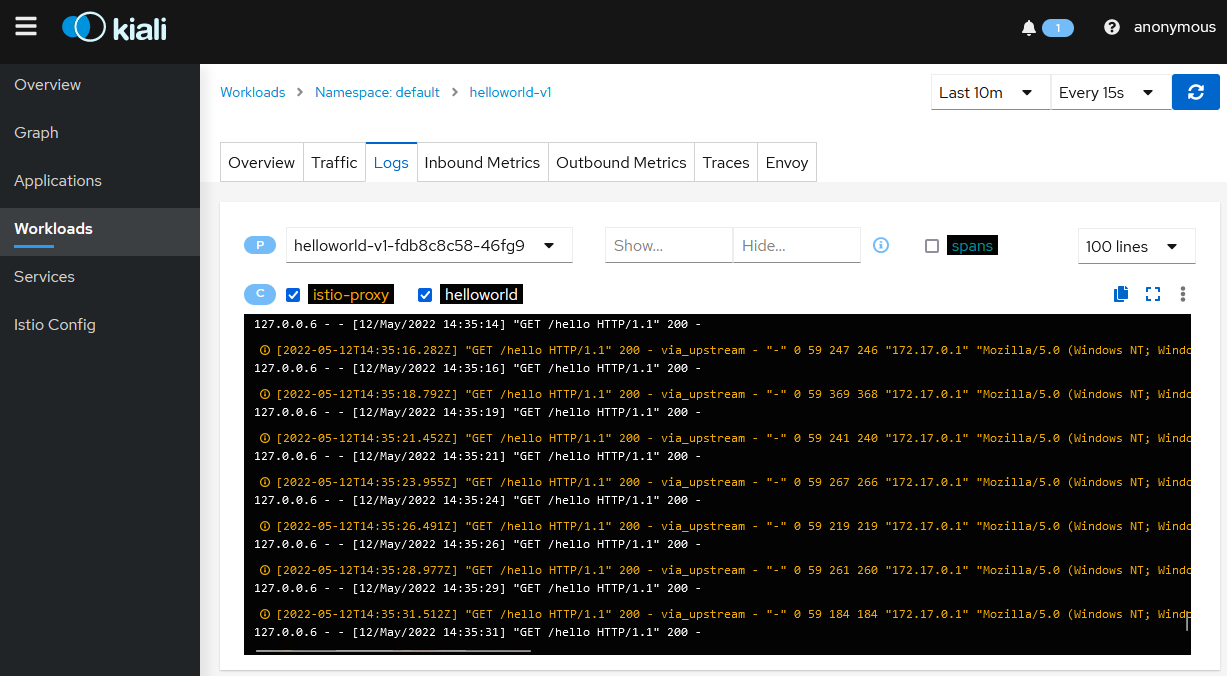
-
Click on
Services, then click on thehelloworldservice. This displays the service topology.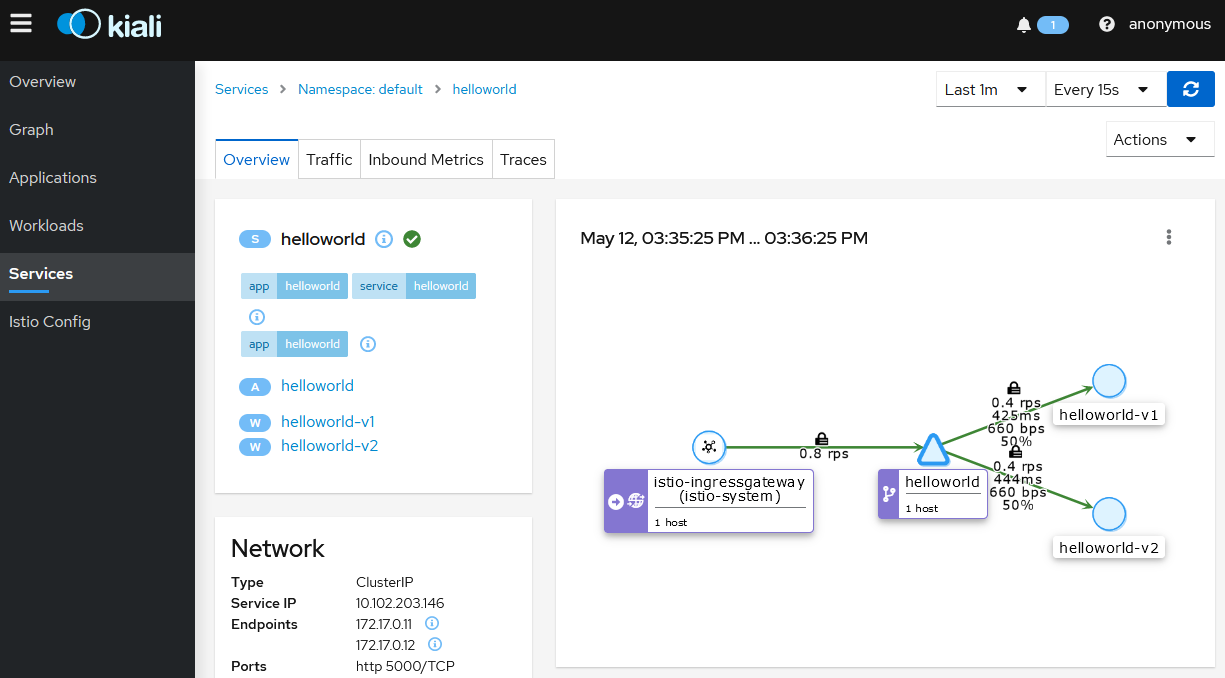
- Click on the
Inbound Metricstab to display the metrics for the ingress traffic for this specific service.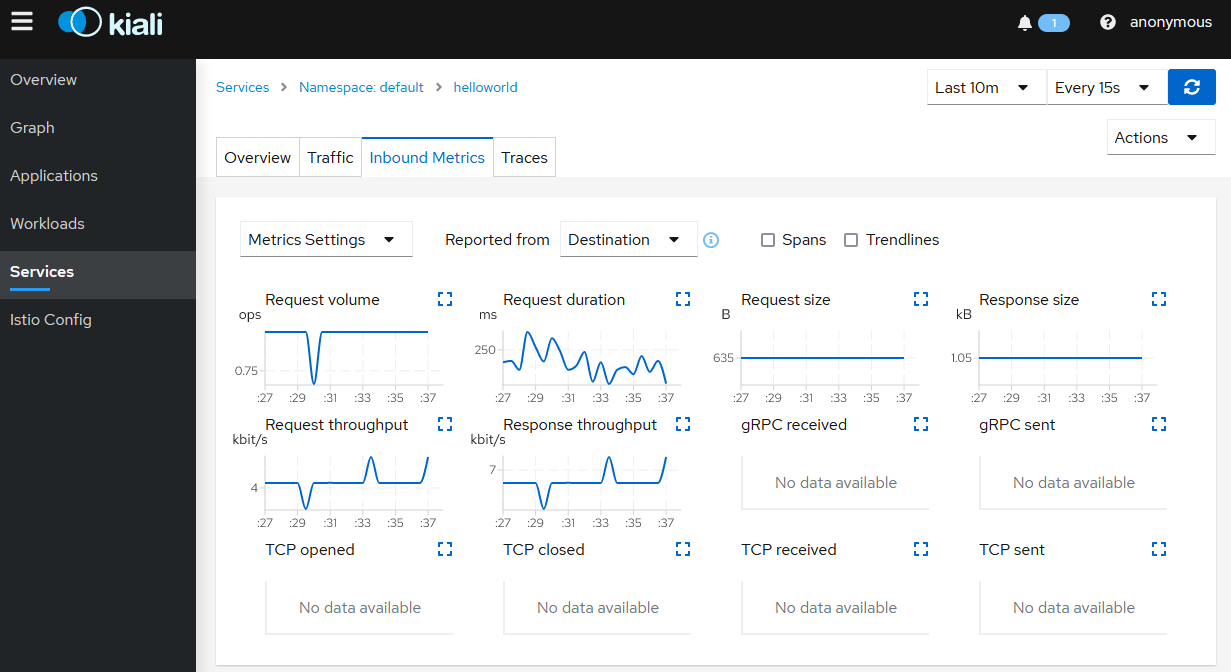
Note: The helloworld application only has one service and all the ingress traffic is directed to it. In more complex applications different paths will route to different services.
Clean up
-
Close the browser window that’s displaying the Istio Kiali dashboard.
-
Switch to the terminal window that’s running the
loadgen.ps1and pressCtrl+C. - Review the gateways and virtual services present in the current namespace.
kubectl get gateways - Delete the gateway and virtual service resources.
kubectl delete gateway helloworld-gateway - Review the resources with the
app=helloworldlabel.kubectl get all -l app=helloworld - Delete all resources with the
app=helloworldlabel.kubectl delete all -l app=helloworld - Remove the label from the
defaultnamespace.kubectl label namescpae default istio-injection-
Note: The dash at the end of the command instructs kubectl to remove the label.
Note: The Istio installation can also be removed but I’ve kept it for further testing.